
Automated Posts
Automated Posts writes posts for you on a schedule. You set the topics once, and WP Wand writes and saves a post every hour, day, week or month.
To use it, go to “WP Wand > Automated Posts” from WordPress menu.
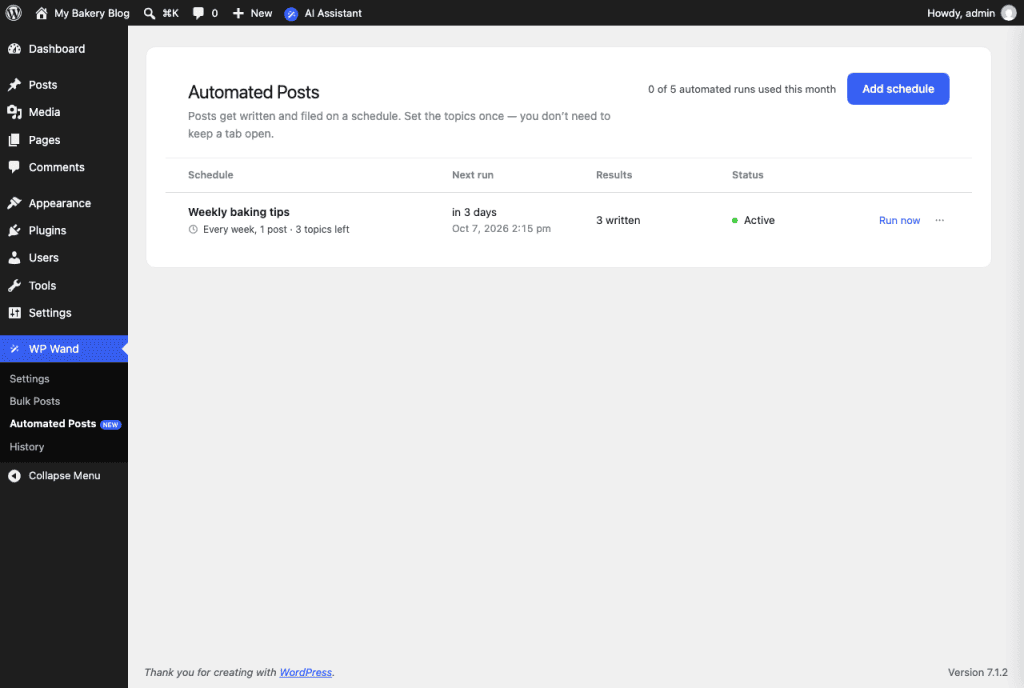
How to add a schedule
Step 1: Click on Add schedule.
Step 2: Give it a Schedule name. This is for your reference only. Then choose where the topics come from.
- My topic list: Write your topics, one per line. The schedule takes the next topic from the list on every run. Start over when the list runs out is already on, so at the end it starts from the top again. Switch it off if you want the schedule to stop at the end and tell you.
- AI ideas: Write what the posts should be about. The AI comes up with a new headline on that subject for every run. You can’t leave this box empty.
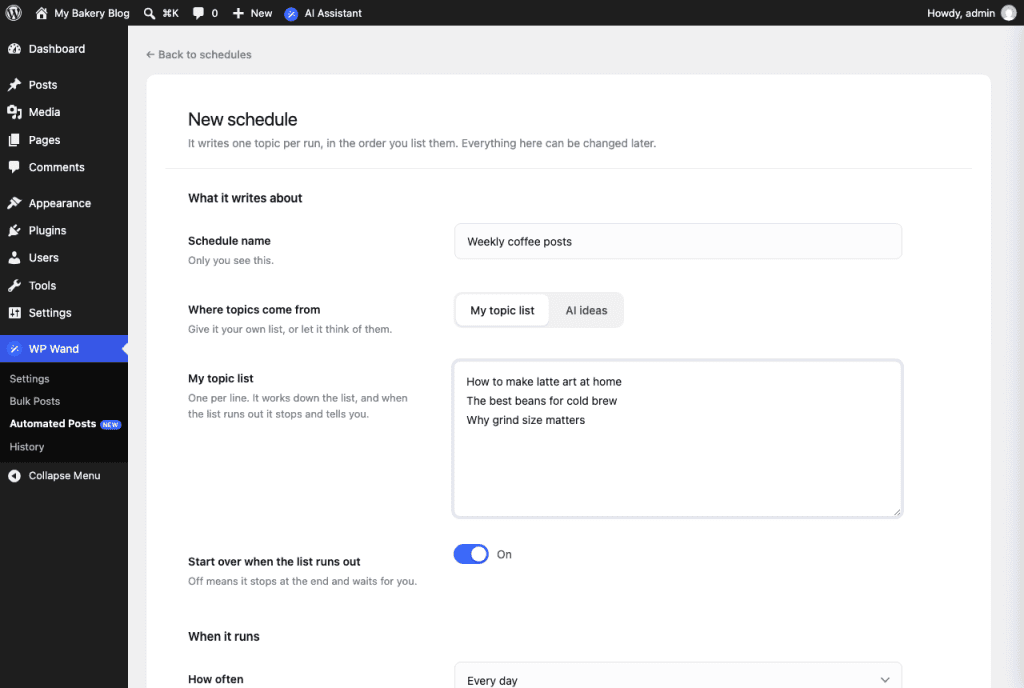
Step 3: Under When it runs, choose How often and how many Posts per run. The time is counted from the moment you save. So, a daily schedule saved at 10 am runs for the first time at 10 am the next day.
Step 4: Under What comes out, choose how each post is saved and how it should be written.
- Save each post as: Draft, Pending review or Published. We recommend Draft. Then nothing goes live until you have read it.
- Language: Everything comes out in this language.
- Writing tone: How the post should sound. Start typing and pick one from the list.
- Keywords to work in: Separate them with commas.
- Roughly how long: Leave it on “Let the AI decide”, or drag it up to 4,000 words.
- Add a table of contents and Add an FAQ section: Switch each one on or off.
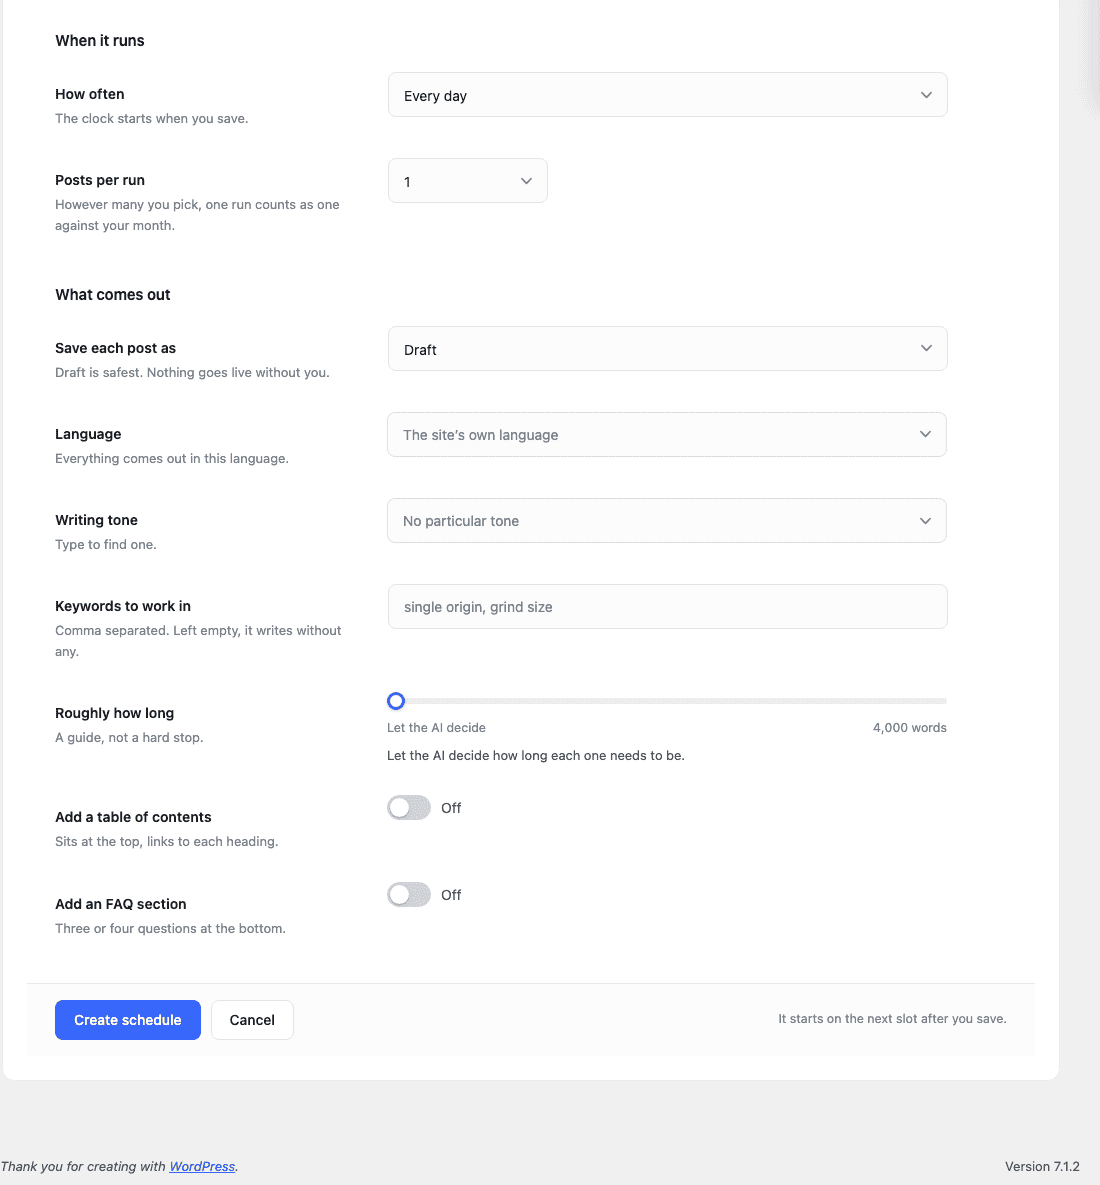
Step 5: Click on Create schedule.
That’s it! You don’t need to keep a tab open for a schedule.
Managing your schedules
Every schedule shows its Next run, its Results and its Status. The status can be Active, Running, Paused, Out of topics or No runs left.
- Run now: Writes this run’s posts right away instead of waiting for the next run. It uses one of your automated runs, and the next run is counted from that moment.
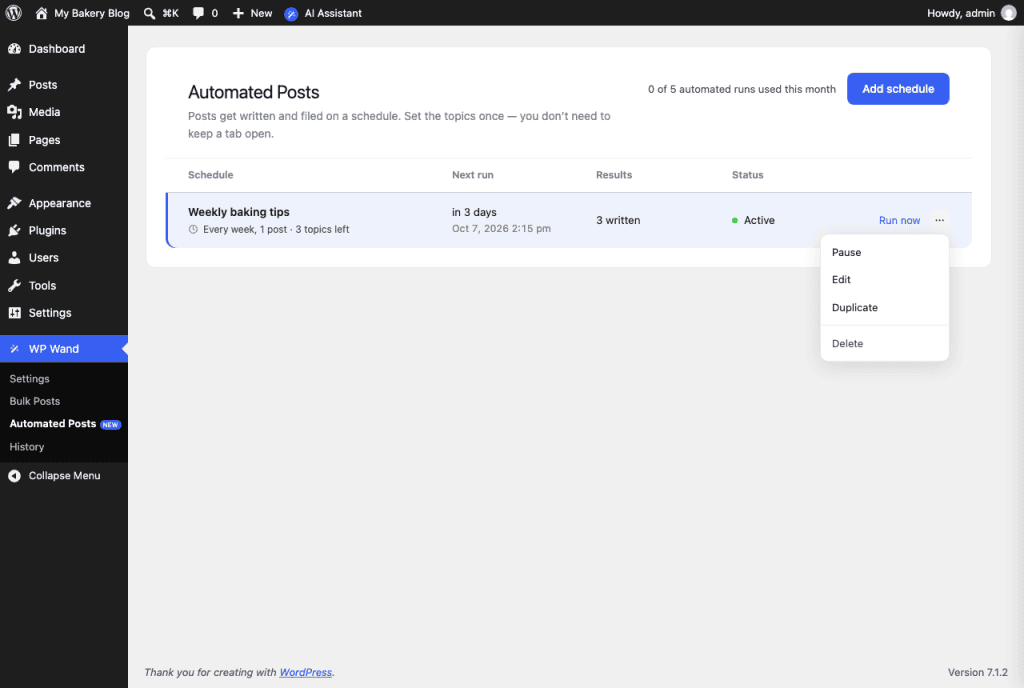
- ⋯ button: Here you’ll find Pause, Edit, Duplicate and Delete. On a paused schedule, Pause reads Turn on. A duplicate starts paused, so turn it on when you’re ready. Deleting a schedule keeps the posts it already wrote.
When a topic list is finished, the status changes to Out of topics. Click on Add topics under Next run, paste more topics and click on Add them.
No runs left means this month’s automated runs are used up. The schedule stays as it is and starts again on the date shown.
How to see the posts it wrote
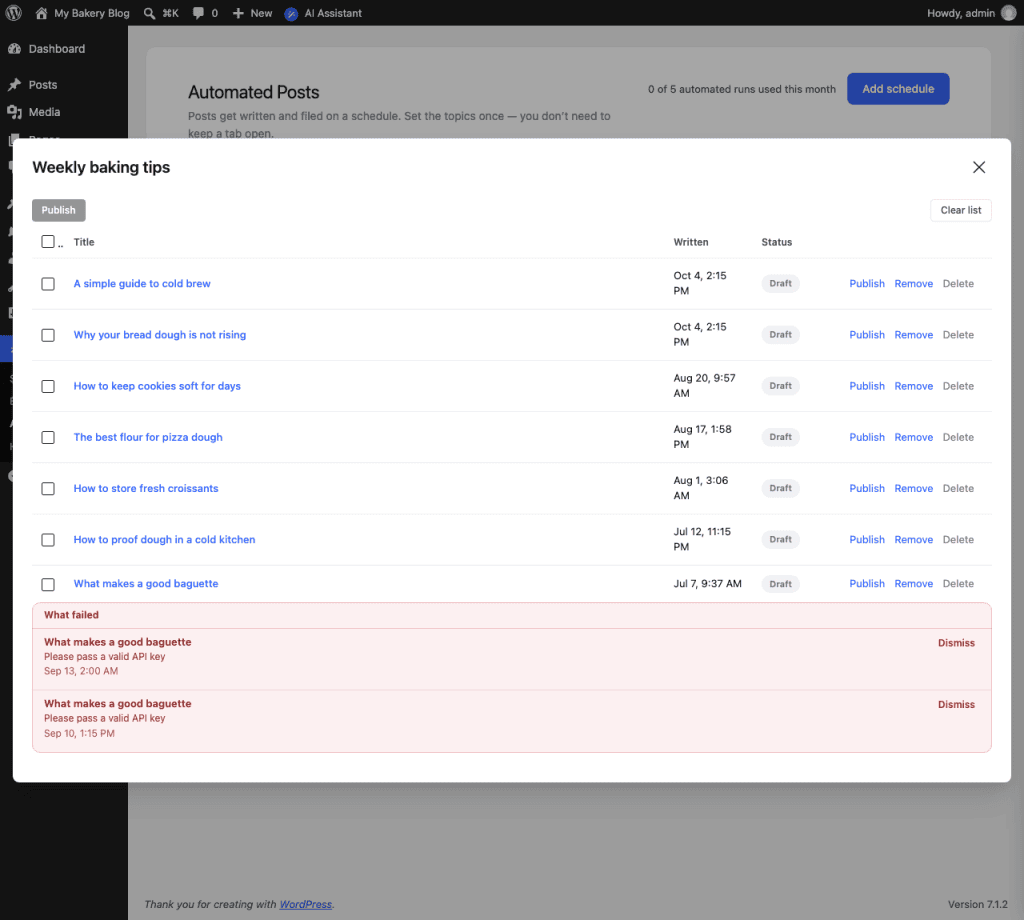
Click on the number under Results, for example “3 written”. You’ll see the 20 newest posts the schedule has written.
- Publish: Puts the post live on your site.
- Remove: Takes it off this list. The post stays on your site.
- Delete: Sends the post to the Trash.
- Clear list: Takes every post off this list. The posts stay on your site.
If a post could not be written, you’ll find it under What failed with the reason.
If a schedule runs late
A schedule runs on WordPress’s own scheduler, which only wakes up when someone visits your site. So on a quiet site a run can be late. To keep it on time, you need a real cron job on your server. Go to “WP Wand > Settings”, click on the Advanced tab, set Where writing runs to On the server, on a real clock and follow the two steps it shows. We have covered this in the Advanced Settings article.
How many runs do you get?
Every time a schedule runs, it uses one automated run, no matter how many posts it writes. On the free version you get 5 automated runs a month, with up to 5 posts in a run. To get more, see the Plans & Limits article.
