
Write with AI Button
The Write with AI button opens the AI Assistant. So, you can generate content without leaving the post or page you are editing.
Where to find it
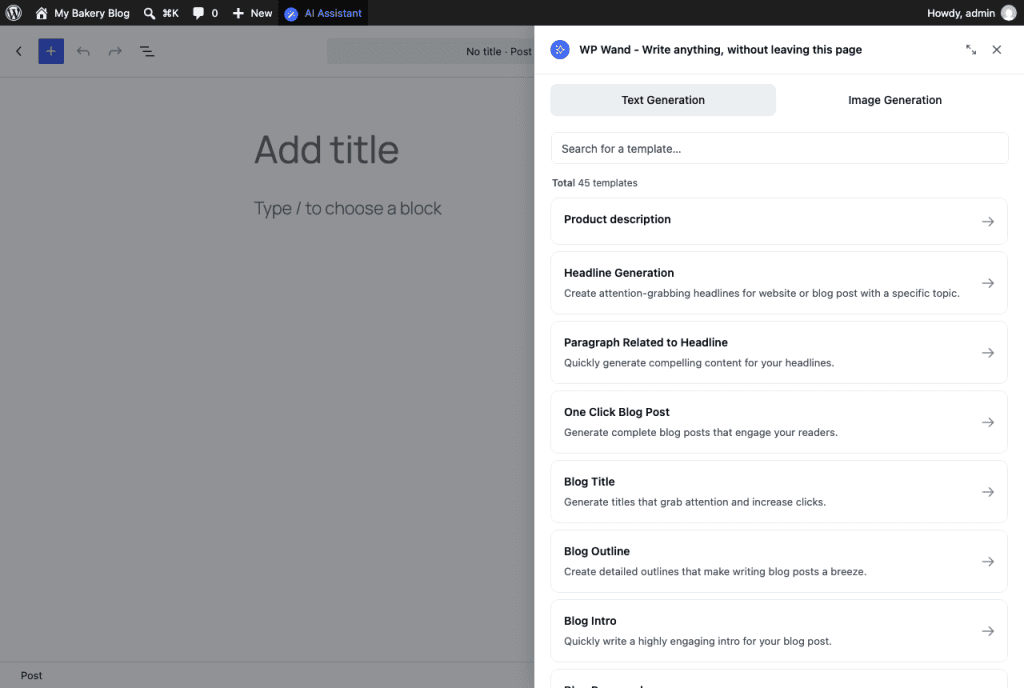
Open any post or page. You’ll see a button called AI Assistant in the bar at the top of the screen. This is the Write with AI button. Click on it and the AI Assistant opens on the right.

In the editor’s full-screen view the top bar is hidden. There you’ll see a small round button on the right edge of the screen instead.
In Elementor, you’ll find a small WP Wand button beside every text field. Click on it and the AI Assistant opens for that field.
You can move the button or hide it. Go to “WP Wand > Settings”. On the General tab, under How it writes, find Write with AI button. There are 3 options: Side, Top bar and Hidden. Top bar is the default. Pick one and click on Save changes.
This option only shows after you have saved a working API key.

How to generate content
Step 1: Pick a template from the list, or type in Search for a template… to find one.
Step 2: Fill in the form. Every template asks for different things. Most of them also let you choose the Number of Results, the Language and the Point of View.
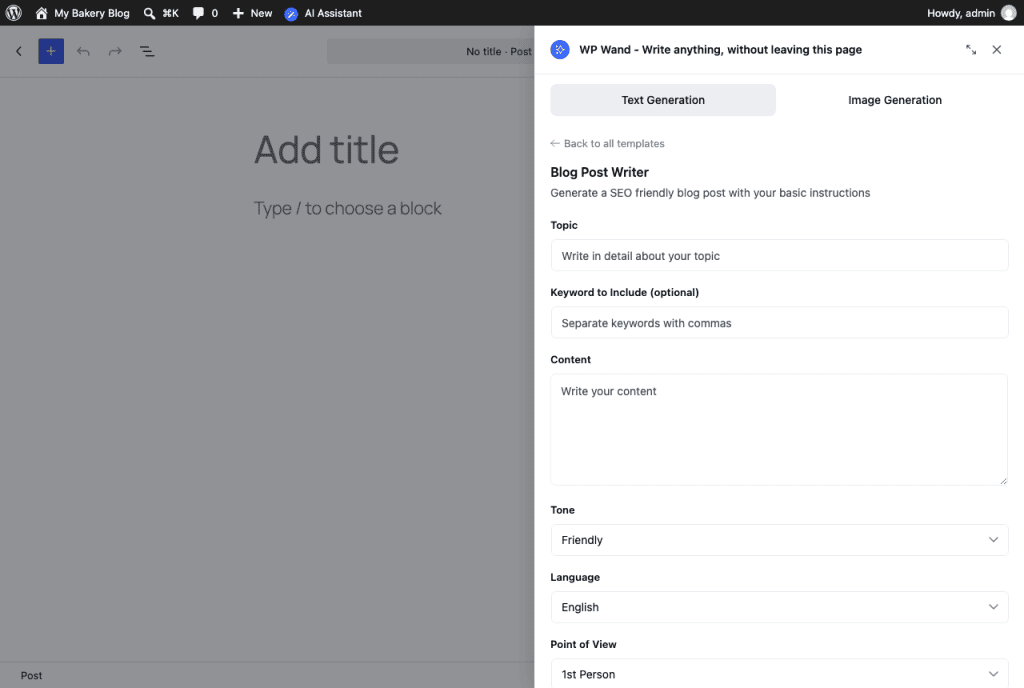
Step 3: Click on Generate Content.
Step 4: The result shows up under Your draft. Click on Insert to put it in your post, or click on Copy to paste it somewhere else.
That’s it!
Generating an image
- Click on the Image Generation tab.
- Write an Image Description.
- Pick the size under Select Resolution and how many you want under Number of Results. The free version makes 256×256 images.
- Click on Generate Image.
- Click on + Add to Media to save the image to your Media Library.
To generate images, you need an OpenAI API key. You can add it from “WP Wand > Settings”.
What Pro adds here
- AI Character: Pick a character and the AI writes in that character’s voice.
- Include Info: Tick Business Details to use your About your business text, or Targeted Customer to use your Who you are writing for text. You fill in both on the Advanced tab. We have covered this in the Advanced Settings article.
- Your own templates: The ones you make in Custom Prompts show up in the same list. We have covered this in the Custom Prompts & AI Characters article.
- Bigger images: 512×512 and 1024×1024.
